GOOD HATCHERY PRACTICE
Monitoring Hatchery Performance
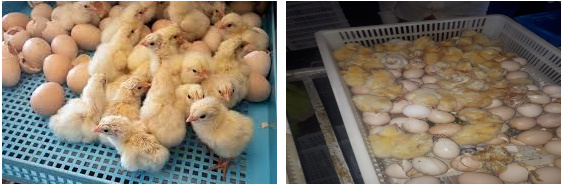
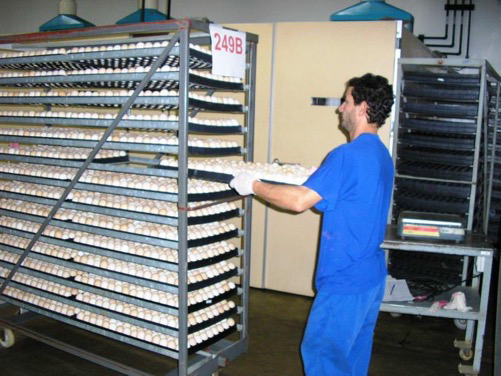
✅ 1. Egg Collection
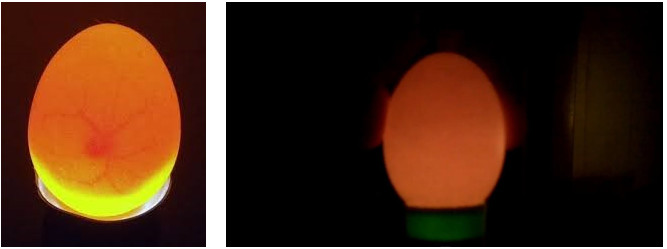
✅ 2. Assessing fertility.
✅ 3. Monitoring weight loss during incubation.
✅ 4. Monitoring temperatures.
✅ 5. Monitoring the hatch window.
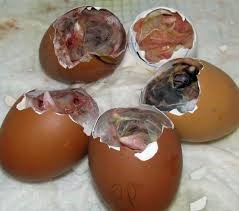
✅ 6. Examining the Hatch debris.
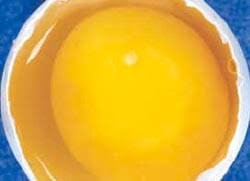
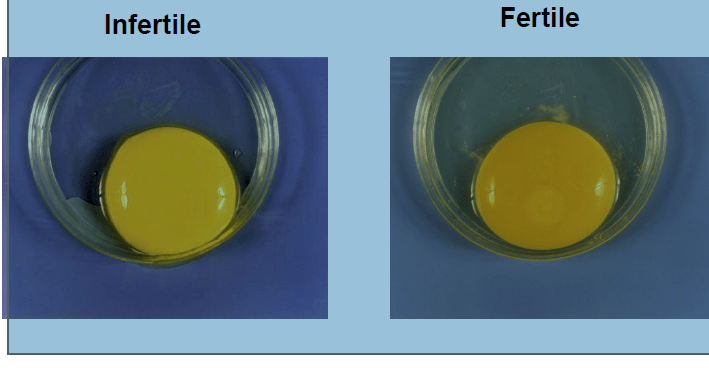
ASSESSING FERTILITY
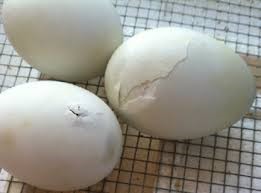
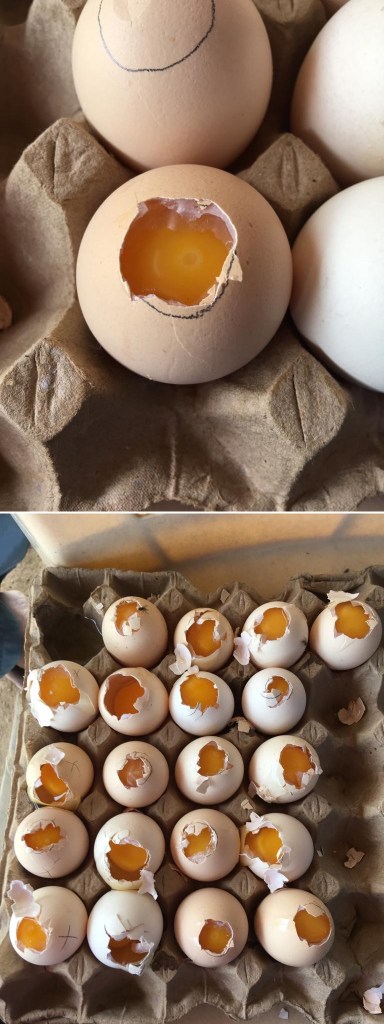
» Breaking out fresh un-incubated eggs.
» Breaking out incubated eggs.
» Breaking out incubated clears after
ASSESSING FERTILITY
Hatch Of Fertile
» Quickly separates fertility or hatchery problem
» Allows manager to focus on hatchery problem
» Expedites troubleshooting
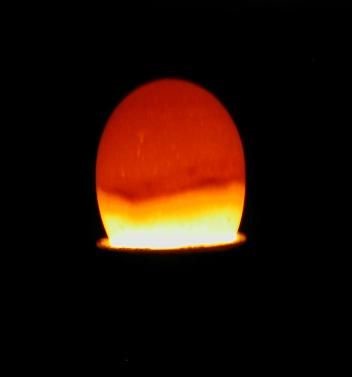
THE HATCH WINDOW
Hatch Window ‘– The time span between the hatching of first chick and the last chick in a hatcher.
» Hatch window is estimated rather measured precisely.
» It can be estimated with the increase in the Relative Humidity when the hatched ot chicks loose their body moisture.
» A hatch window of 12- 24 hours is achievable with good equipment and Management.
Suggestions for a good Hatch Window
» Aim for the setter to have eggs from the same age group, breed, egg size and storage time.
» Aim to have uniform incubation temperatures.
Ensure uniform internal temperatures of all eggs in setter prior to the onset of incubation
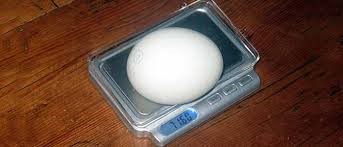
WEIGHT LOSS
- Egg weight loss to 18 days..
- Chick Yield.
- Developing egg through the surface pores exchange oxygen & Carbon dioxide with the incubator air.
- Water is also lost through these pores.
- Weight loss from the start of incubation and at the time piping is equivalent to 12% of the HE weight.
- It is a normal practice to weigh a representative sample of HE before Hatching commence.
- If eggs are stored for a six day period then the weight loss is approximate 11.5%of the egg setting weight.
- Aim for 12 percent total weight loss from initial egg weight during the first eighteen days ( 0.6% – 7 % per day).
- The air inlet is opened gradually after 4 days of incubation to keep the Relative Humidity (RH) not to rise and RH is kept low during the last days of incubation to enable a 12% weight loss on 18 th day.
- Increase RH during last days of incubation if shells and shell membranes show dehydration.

TEMPERATURES
- Measurement of eggshell temperatures during incubation.
- Chick Yield. measuring the temperature exposure profile of eggs.
- Temperature recording is an important feature in Hatching process and starts from the Nest boxes where eggs are collected .
- On the farm the eggs should be cooled below 24C within 4 hours after collection and then stored at 24C or 75.2*F.
Common issue during egg handling in relation to temperature are
» Eggs left too long at the nest boxes allowing the hen to rewarm them when it enters the nest box.
» Too little collections allow the temperature of egg to be at house temperature.
» Eggs should be collected on plastic trays if fibre trays are used then it will allow slow cooling.
» Eggs store door open too long in hot weather.
» Eggs once collected should be immediately sent to the egg store without any delay.
» Egg collection vehicles are not temperature controlled.
» Farm and hatchery stores are maintained at different temperatures.
» When the cooling equipment of egg store is not efficient in maintaining the correct temperature then this will result in weak chicks.
» Any of the above temperature variation causes will result in Early dead , and blood ring mortality.
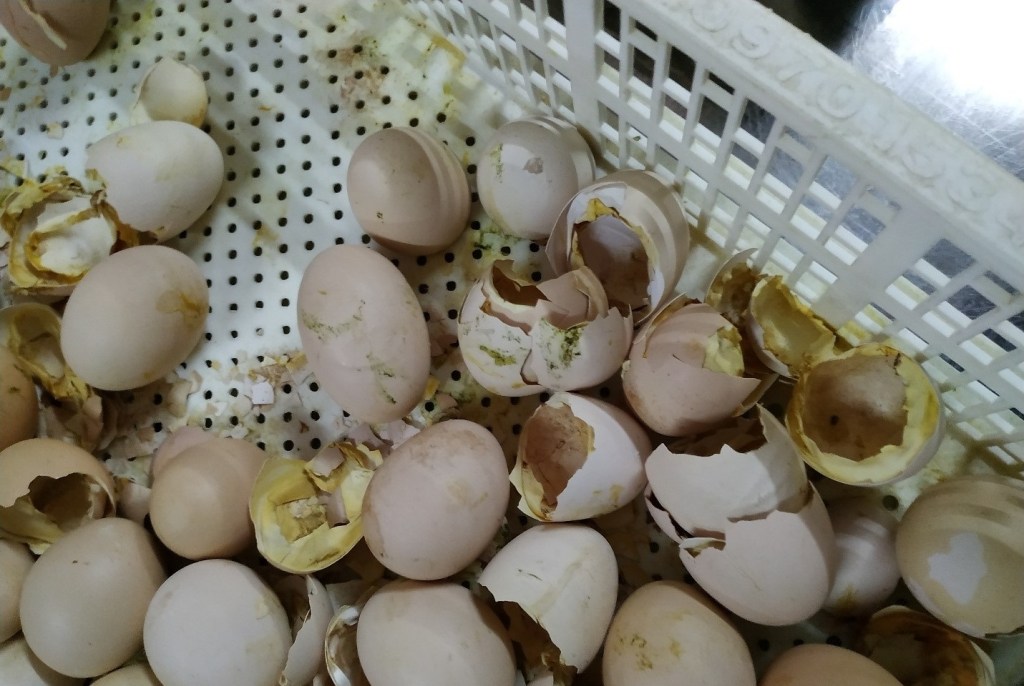
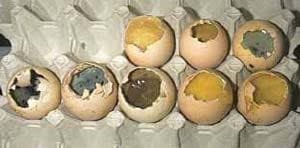
EXAMINING HATCH DEBRIS
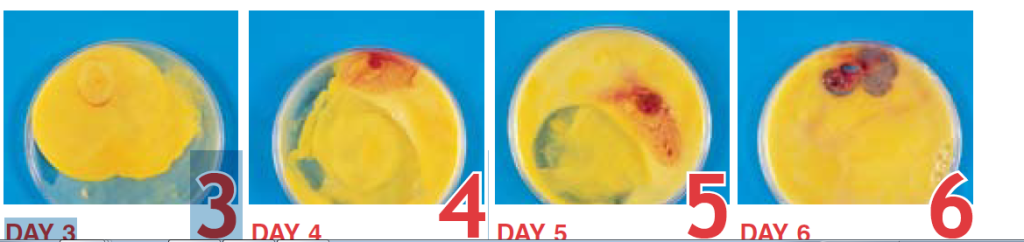
- Assessing Developmental stages and malformations.
- Assessing Normal hatching Position and Malformations.
- Assessing Egg Contamination.
EXCESS INFERTILE
- Immature males
- Overweight males.
- Unbalanced Mating ratio .
- Females avoiding males because of over mating.
Improper male ration
EARLY DEAD
- Farm transport or storage issue.
- Infrequent egg collection at the farm,
- Immediate setting on receiving at the Hatchery.
- Long storage under unsuitable conditions.
- High early incubation temperatures.
- Improper Disinfection of eggs at the hatchery

DEATH FROM 3-4 DAYS EXCESS “BLOOD RING
- Nutritional deficiency.
- Bacterial contamination.
- Mixing of clean with floor eggs.
- Similar reasons attributed to Early Dead.
BLACK EYE – 5-12 DAYS DEATH
- Poor Nest Hygiene at the Farm.
- Bacterial contamination due to cracks on the eggs.
- Nutritional deficiency.
- Floor eggs.
In efficient Disinfection of eggs at the Hatchery

DEATH 13-17 DAYS – EXCESS FEATHERS
Birds appear reddish brown due to decomposing blood in this stage.
- Nutritional deficiency.
- Contamination.
- Inappropriate Incubation conditions.
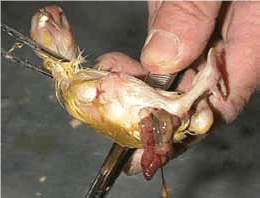
EXCESS OF TURNED EMBRYOS- DEATH 18-19 DAYS
The embryo occupies entire shell, and head is turned towards the air cell end. Yolk sac is outside the abdomen.
- Damage at the transfer.
- Inappropriate temperature /humidity in setter/hatcher.
- Egg set upside down.
- Excess moisture due to high humidity in the setter.
- Nutritional deficiency or Contamination.
EXCESS PIPPED AIR CELLS
Mostly similar to turned embryos
- Humidity is high at the hatcher after transfer.
Similar reasons as that of turned embryos
MALFORMATIONS
Head: Exposed Brain, Missing eye , Beak, face abnormality.
- High early incubation temperature.
- Nutritional deficiency.
Legs & Toes: Shortened, bent or twisted toes ,lameness - Nutritional deficiency.
- Smooth paper in the Hatcher basket.
Ectopic viscera: Intestine outside the fully developed chick.
- 1. High setter temperatures during mid – incubation.
Extra limbs: Extra Legs or Wings.
- 1. Rough handling of eggs during collection & transport.
EARLY HATCHING
Factors affecting early hatch include:
» Extended pre-heating periods
» Setting eggs too early
» Incorrect temperature and humidity settings
» Hot spots within the setter / hatcher
» Incorrect ventilation
» Seasonal temperature effects
» Egg size
LATE HATCHING
Factors affecting late or delayed hatching include:
» Setting eggs too late
» Incorrect temperature and humidity settings
» Incorrect ventilation
» Eggs which have been stored for long periods
» Eggs stored at too low a temperature
» Incorrect setting patterns in multi-stage machines
» Disease or fertility problems

EXCESS PIPPED AIR CELLS
Interpreting Residue Breakout to correct Incubation conditions
» Good hatchery Results.
» Hatchery calculations.
» Residue Egg Breakout :Procedure
» Residue Breakout : Interpretation.
» Dealing with the data.
GOOD HATCHERY RESULTS
What is good?
» High hatchability.
» Good Chick Quality
Satisfied Customers.
Good hatchery Results
» HOS % = ‘ hatch of eggs set’
» HOF % = ‘hatch of fertile’
» DIS % = ‘Dead In Shell’
Good hatchery Results
How to measure “Good Chick Quality”
» % Culls
» PASGAR* Score
Weight (+uniformity)/length/YFBM
Good hatchery Results
How to measure ‘Satisfied Customers’
» I week mortality.
» 7 day Body weight.
» A silent Phone…..
ARE HATCHERY RESULTS ALWAYS GOOD
How do we find out when it is not good?
» Customers , Hatchery reports a problem
- Too many Unhatched eggs
- Very poor chick quality.
Data Analysis ( Results compared with standards, Downward trends)
Are hatchery results always good.
If Not then find out the reason.
» Is it an isolated incident or frequent occurrence.
» Is it concerned with a breeder flock, or all flocks, machinery failure?
» Is it Breeder flock age related or is it concerned with all ages.
Is it related to Egg storage conditions.
Are hatchery results always good.
If Not , why then reasons
» Breeder flock -> Egg quality?(Health Issue, Nutrition)
» Egg Handling ?
» Hatchery ? ( Maintenance, Hygiene)
- Setter
- Hatcher
HATCHING EGG BREAKOUT
Breakout analysis of hatching eggs must be done to evaluate the breeder flock’s progress with respect to fertility and hatchability. It is an absolutely essential diagnostic tool for identifying the cause(s)of problems in hatchability. Three types of breakout are advantageous in evaluation and problem analysis.
These are:
(1) breakout of fresh, non- incubated hatching eggs.
(2) candling of eggs incubated for 5 to 12 days, breakout of nonviable eggs, and recording of eggs set small end up.
(3) breakout of eggs that did not hatch (hatch residue).
Breakout of fresh eggs is used to provide an
- Immediate evaluation of flock fertility and to confirm fertility estimated from hatch residue breakout and candling between 5 and 12 days of incubation.
- The breakout following candling will include eggs determined to be infertile, eggs containing early dead, and cracked eggs.
- The hatch residue breakout includes all eggs that did not hatch. Candle breakout and residue breakout should be done weekly or at least every 3 weeks.
Regular, consistent analysis of these breakouts will result in flock histories.
» It can be used to diagnose hatchability problems, minimize losses, compare strains, flocks, farms, hatcheries, and many other variables.
» Sample selection and size are important for obtaining valid results from the breakouts.
» Samples should be selected to include eggs from representative locations in setters and hatchers for each flock at each sampling time.
- Sample size should be
- 10 unhatched eggs from 5 hatcher trays;
- All unhatched eggs from 4 hatcher trays per setter or hatcher;
- All unhatched eggs from 1,000 set eggs; as well as many others.
Records should include, following variables
» Flock, strain, farm, date set,
» Machine(s) used,
» Location of eggs in machine,
» Number of eggs set, number of fertile eggs,
» Number of early dead (0 to 7 days).
Number of middle dead (8 to 14 days),
» Number of late dead (embryos 15 days or older), age of each embryo, malposition (in embryos19 days or older), number pipping, malformations,
» Number of eggs contaminated (rots),
» Number of cracked eggs (transfer cracks and others),
» Unusual egg traits (size, shape, shell quality, cleanliness), Number of dead and culled chicks,
» Number of live chicks.
» Clear, accurate records are essential for useful egg breakout analysis.
- Eggs should be removed from the hatcher tray, placed on egg flats, and identified as to flock, location, etc.
- The exterior of the egg is examined first for egg traits, pipping, and location of the air cell.
- The shell is cracked at the large end, over the air cell, and a hole opened in the shell and membranes to observe the interior of the egg.
- If the egg appears to be infertile or contains a very early dead embryo, the germinal disc must be located to make a definitive identification of fertility.
- If the embryo is relatively small, the egg can be broken into a dish for further examination.
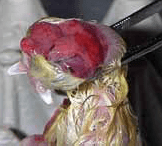
- Eggs with late-stage embryos should be observed for pipping into the air cell, then opened with tweezers or scissors from large end to small end without disturbing the position of the embryo.
- The embryo’s position (see earlier discussion on positions), the embryo’s age (see section on development stages), malformations, contamination, and other factors should be observed and recorded.
- Comparisons with live embryos of various ages can be used to train those developing experience in the breakout technique.
STANDARD TEMPERATURES: PRE-HEATING

25° C – 77° F
30-60
500-600
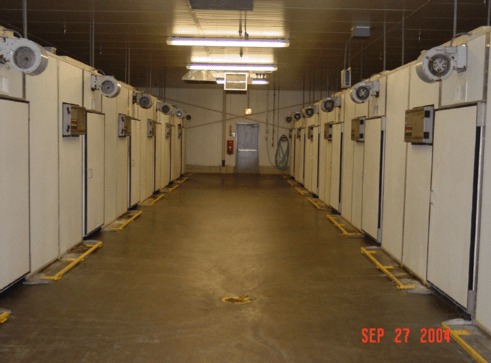
STANDARD TEMPERATURES: SETTER ROOM
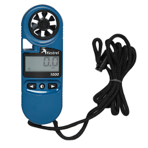
» Temp., CO2, Air speed, RH
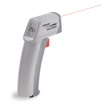
» Thermal pictures
» Check the records on setters.
» Everything is important
» Open machine, take thermal pictures, look for cold/hot spots


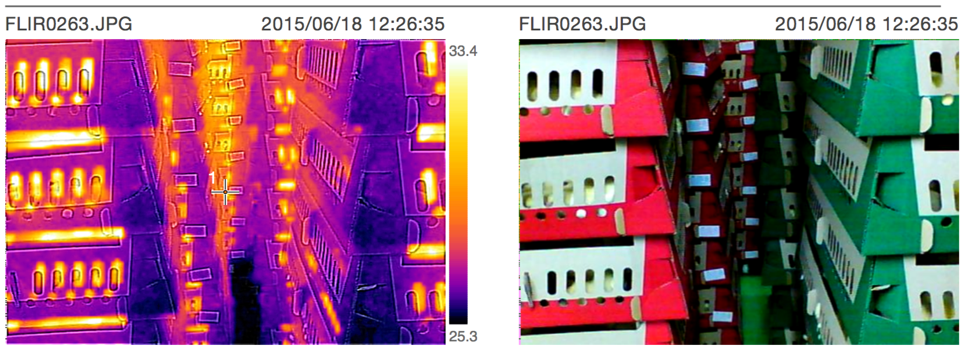
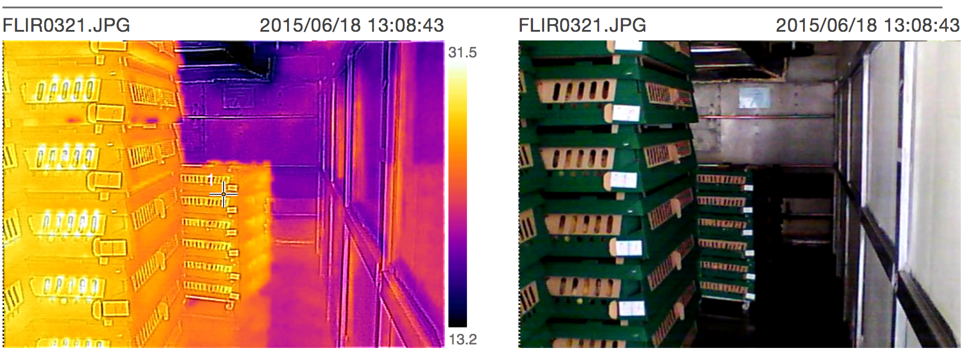
STANDARD TEMPERATURES: HATCHER ROOM
Window of hatch
» % hatchability
» Records
(temperature/ RH)
s
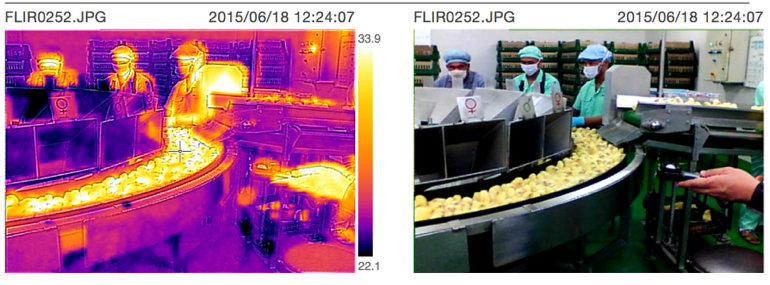
STANDARD TEMPERATURES: SEXING/PROCESSING ROOM

STANDARD TEMPERATURES: HATCHER ROOM
s
STANDARD TEMPERATURES: SEXING/PROCESSING ROOM
STANDARD TEMPERATURES: TRUCK
s